A Pre-Paid account is the most efficient way of paying for your journey as the cost is deducted from your credit.
✔ Receive 10% discount per passage
✔ Pay for passages already made within the payment window
✔ Pay for future passages
✔ Email reminders when you have a low balance
✔ Auto Top-up when your account reaches a nominated balance amount
✔ Manage multiple vehicles on your account
Sign up for a Pre-Paid account here.
You can add as many vehicles as you want to your account.
No. You can only have a vehicle on one Pre-Paid account at a time.
You can travel straight through the Tunnels without a delay after topping up your Pre-Paid account.
If any journeys you have already made are not yet appearing on your account, please check that you have:
1. Added the correct vehicle
AND
2. You have sufficient funds to cover all journeys
Provided you have done both of these things within the payment window (by midnight the day after your journey(s)), you do not need to take any further action. Your journey has gone for a manual review by one of our agents. Please allow up to 7 days for this to be done and for the journey to appear on your account. This will appear as a “correction” on your account.
Manual corrections can be made to accounts for a number of reasons. Please see the common reasons below;
- Your number plate was not read with high confidence. In this instance a staff member will review the vehicle image and deduct your toll manually
- You have a Direct Debit. The top-up could appear as a “correction”
- You have topped up by cheque. The top-up could appear as a “correction”
If you are ever unsure about a correction please call our contact centre and an agent can talk through this with you.
To close your account, please click here and complete the form.
Via the website…
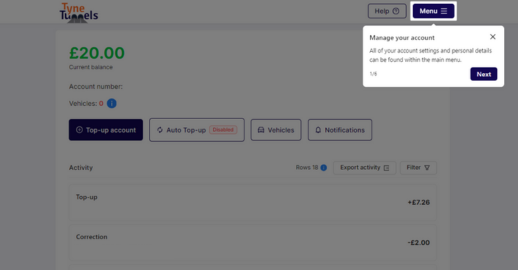
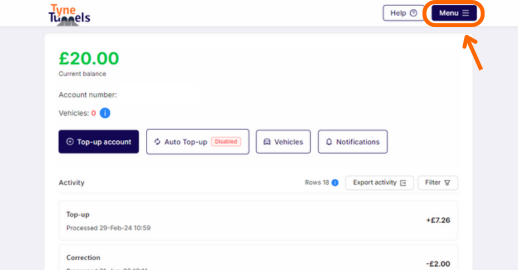
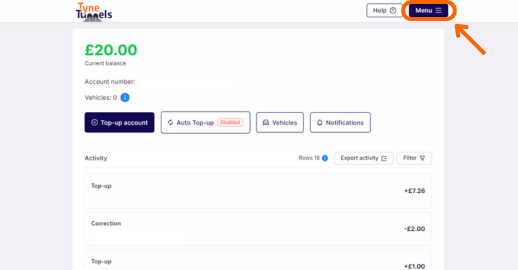
Step 1 – Login to your Pre-Paid account and click “Menu”
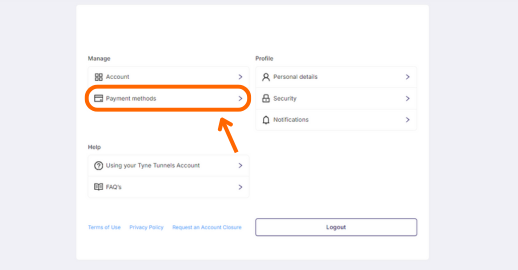
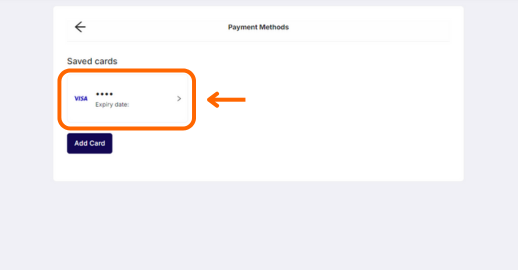
Step 2 – Click on “Payment Methods”
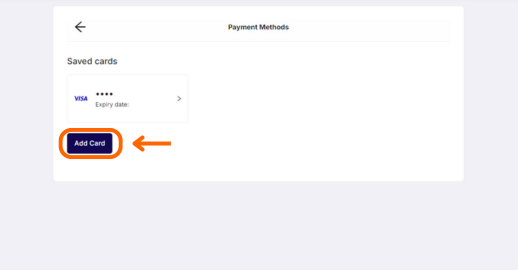
Step 3 – Click on “Add card”
Step 4 – Enter your card details then press “Save Card”

Step 5 – Your saved cards appear here in the Payment Methods menu. You can use this to activate Auto Top-up.
To delete a card, click on it, press the red “Delete card” button
Via the app…
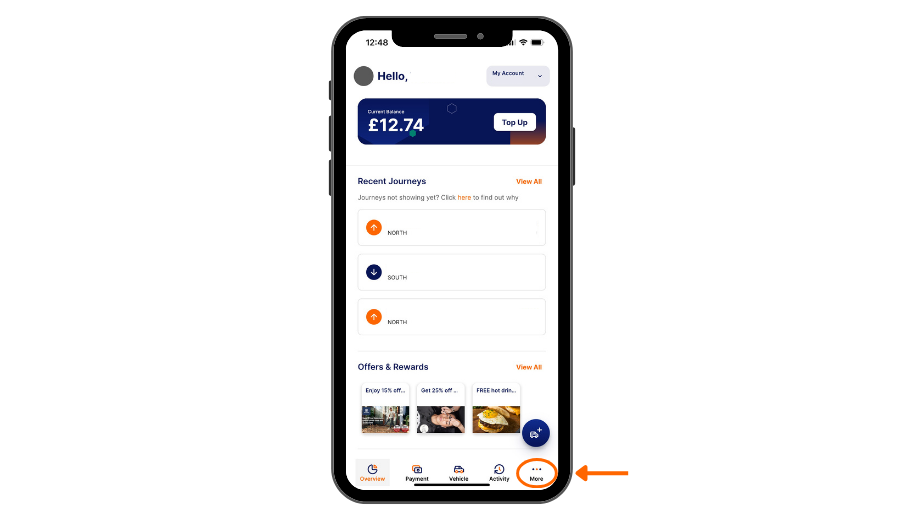
Step 1 – Open the app and click “More” in the bottom right-hand corner
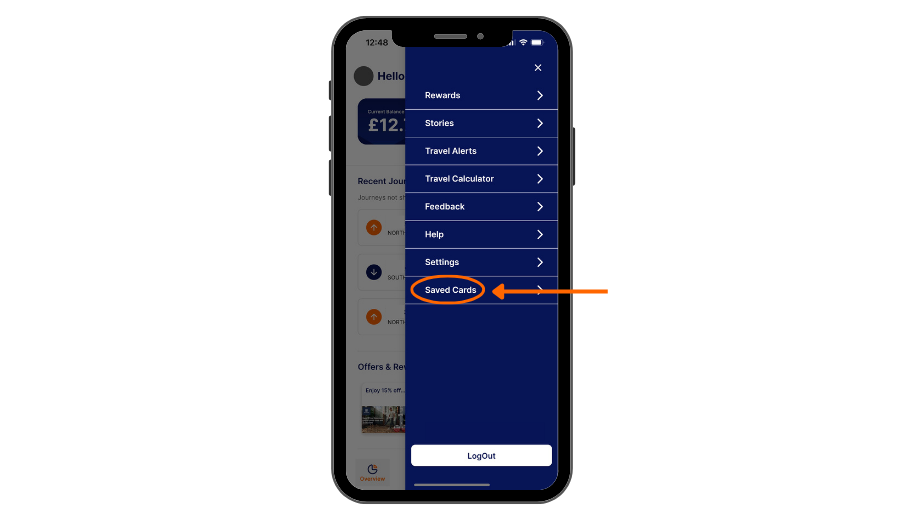
Step 2 – Click “Saved Cards”
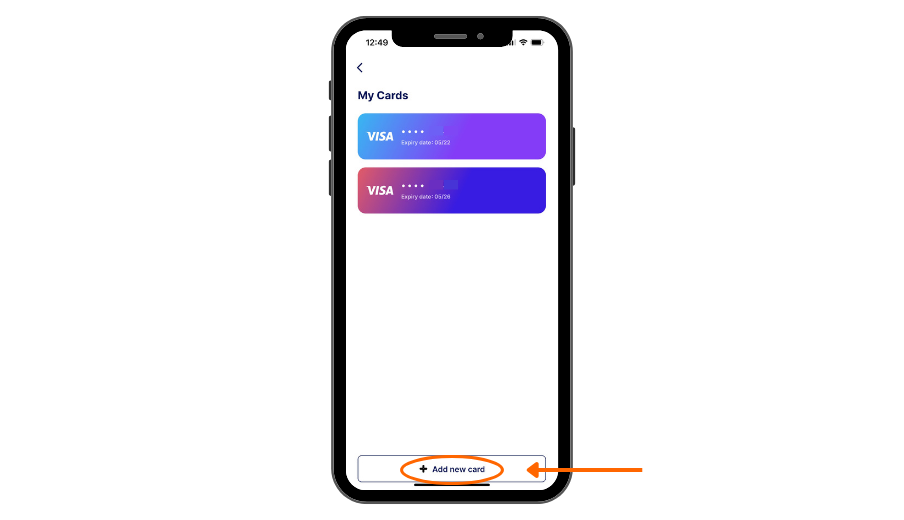
Step 3 – Click “Add new card” in the bottom bar
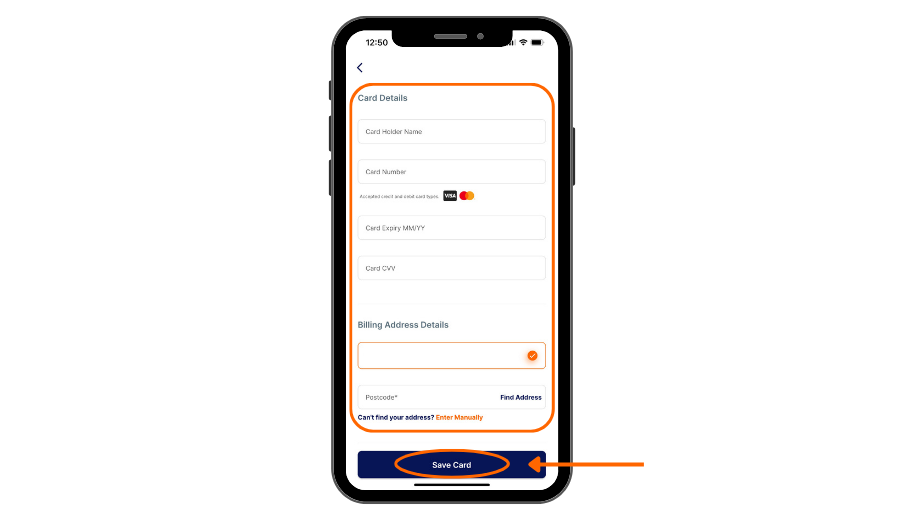
Step 4 – Fill out the payment information then press “Save Card”
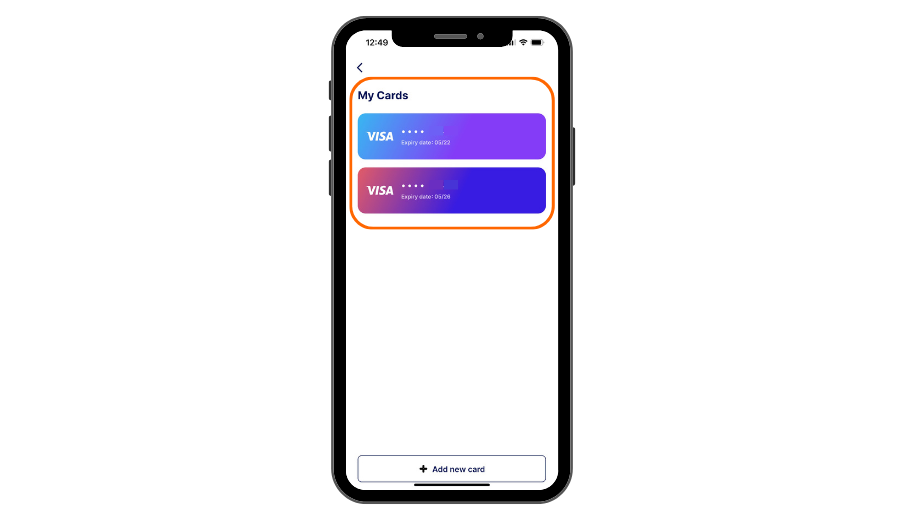
Step 5 – Your saved cards appear here in the Saved Cards menu. You can use this to activate Auto Top-up. To delete a card, swipe it to the left and then press “Remove”
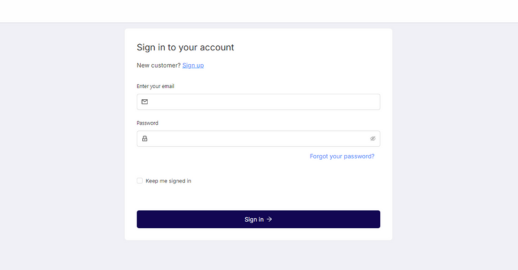
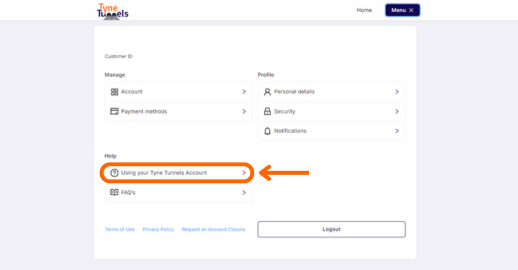
Step 1 – Login to your account here, or sign-up here
Step 2 – Click the “Menu” icon in the top right hand corner
Step 3 – Click the “Using your Tyne Tunnels Account” button under the “Help” section
Step 4 – Select an option from the menu and a guided tour will start
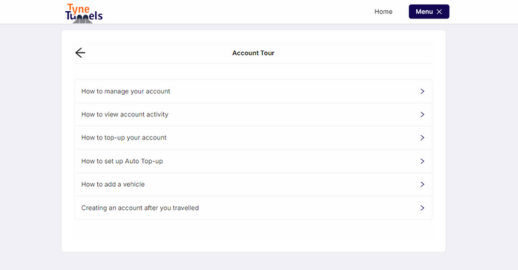
Step 5 – You will then be guided through your selected tour